On-Site Repair On A Caribbean Island
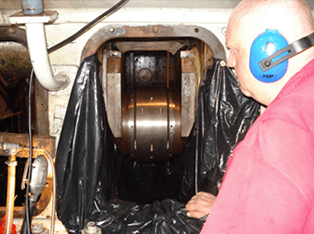
n-situ Machining Solutions (UK) Ltd have successfully completed extensive repairs to a large four stroke diesel engine crankshaft situated on a Caribbean island. To remove the crankshaft would have been a total disaster in terms of cost and engine downtime.
The work took the form of repairs to crankpin and main journal bearing diameters after the engine had suffered a major seizure whilst in operation which led to induced hardening (650 HB) caused by intense friction between the bearing shells and journal diameters.
After an extensive journal calibration it was decided and in conjunction with the OEM that the crankpin diameter had to be reduced by 16mm and the main bearing by 7mm to eradicate the induced hardening that had occurred. The calibration service consisted of a full measurement, hardness test, MPI via the magnetic particle process and a concentricity check of the crankshaft to establish if any bend had occurred from the engine failure.
In-situ Machining Solutions (UK) Ltd have a series of turning/superfinishing/polishing machines to very effectively overcome problems of this nature.
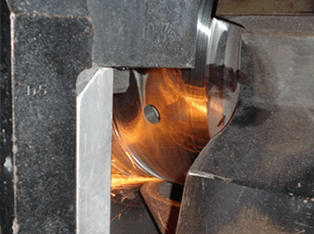
For the crankpins, orbital turning machines are used to speedily reduce the diameters of damaged crankpins. These are designed to rotate on the crankshaft within the fillet radii of the crankpin and are far more effective than grinding methods used by some of our competition.
In cases where the fillet radii are damaged or eccentric to the crankshaft axis as in the case of this particular engine, the company have a unique means of repair using an orbital turning machine mounted onto a dummy or false journal system to re-cut the fillet radii.
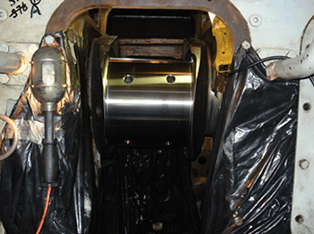
16mm was machined from this crankpin to remove the induction hardened area and finally superfinished and polished to Ø374mm. The fillet radii and oil holes were re-formed to OEM procedure and blended into the newly machined undersize diameter.
On completion, flatness of the pin was checked with a straightedge and engineers blue, 90% contact recorded in several positions around the journal.
Parallelism of the crankpin to the crankshaft centreline was calibrated and recorded to be within 0.09/1000mm using a precision micro-level and checked in four positions around the crankpin.
Surface finish of the crankpin on completion was 0.2 Ra µm well within the OEM limits, so too the hardness readings and no surface cracking recorded.
Dial indication of the adjacent main bearings to the damaged crankpin with the crankshaft being rotated by the engine’s barring gear proved to be within the manufacturer’s tolerances.
Unlike the crankpin work, this repair cannot be undertaken using orbital machining equipment due to extremely limited access, only 8mm, between main bearing diameter and the main bearing bore housing of this underslung engine.
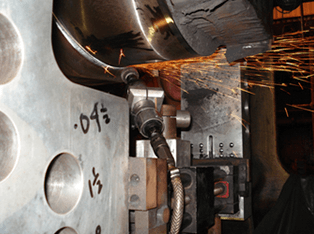
Since this repair had never been carried out on this particular engine, In-situ Machining (UK) Ltd engineers designed and produced a grinding system to undertake this repair.
The machine is designed to locate in the area which is normally occupied by the main bearing cap and consists of support brackets, linear rail system and heavy duty pneumatic grinding head which is traversed across the main bearing in a series of cuts as the crankshaft is rotated by the barring gear system of the engine.
The fillet radii of the bearing are also ground using an additional attachment, these were formed to OEM procedures and blended into the newly machined 7mm undersize diameter, so too the oil hole radii. A small allowance was left on the diameter of the main bearing to allow for final superfinishing and polishing to Ø443mm.
Flatness of the main bearing, hardness and surface and crack detection was checked and were similar to that of the crankshaft work and within the OEM guidelines for limits and fits.
All measurements were taken using calibrated equipment, including a special outside micrometer which had to be produced to access the 8mm gap between the main bearing and main bearing pocket.
The work associated with the crankpin and main bearing was inspected by customer engineering and the insurance company representative.
Feedback from the customer and the OEM are delighted that the engine has been running successfully with normal bearing operating temperatures in excess of 12 months.

